> ## Documentation Index
> Fetch the complete documentation index at: https://docs.propaga.mx/llms.txt
> Use this file to discover all available pages before exploring further.
# Cash and Carry Integration
> How to implement Propaga's cash and carry solution
We built a cash and carry solution tailored to wholesalers, distributors, and B2B marketplaces so that your team could integrate Propaga's cash and carry solution into your checkout or point of sale system.
## Cash and Carry Implementation
Our cash and carry implementation consists of the following steps:
You will need to set up cashiers or delivery agents to access the cash and carry system. You will need to send us the list of cashiers or delivery agents with their names, emails, and branch stores.
You will need to enable Propaga on your system or network to allow the cashiers or delivery agents to access the cash and carry system and create transactions for the customers.
Once the customer has been verified, you will need to follow these steps to create a transaction for the customer:
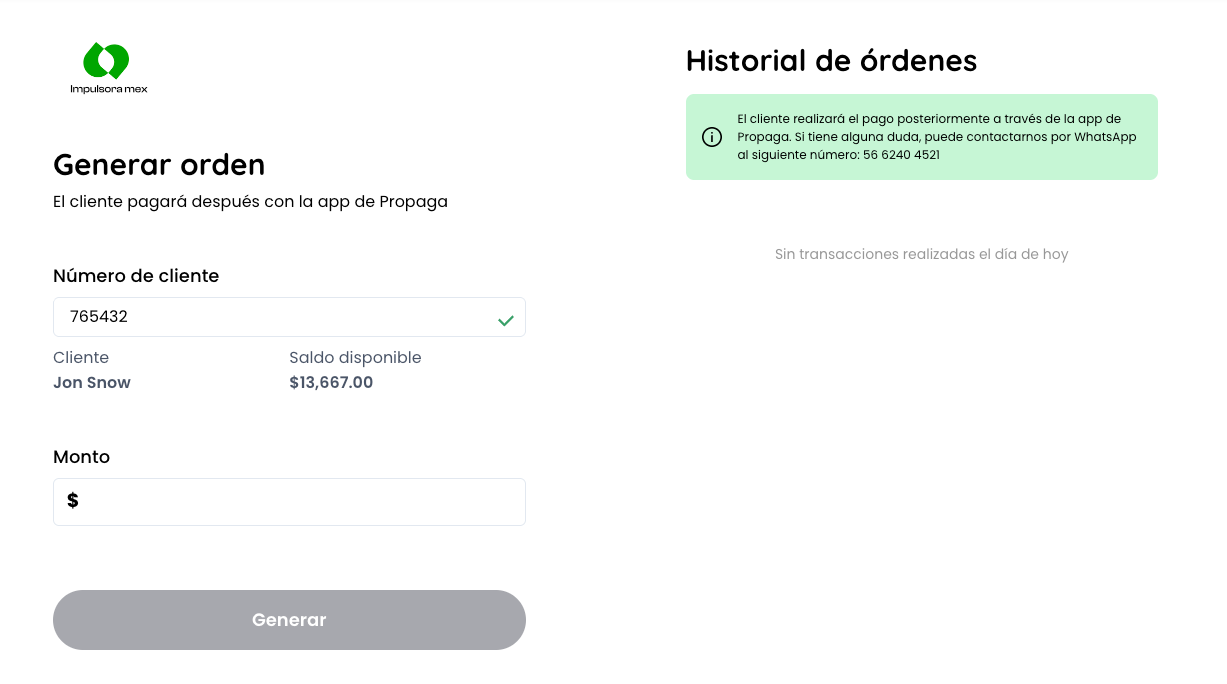
You will need to ask the customer for their user ID or scan the barcode shown on the customer's Propaga's Payment Portal. Once the user ID is captured, you will now see the user's name and the credit available at the moment.
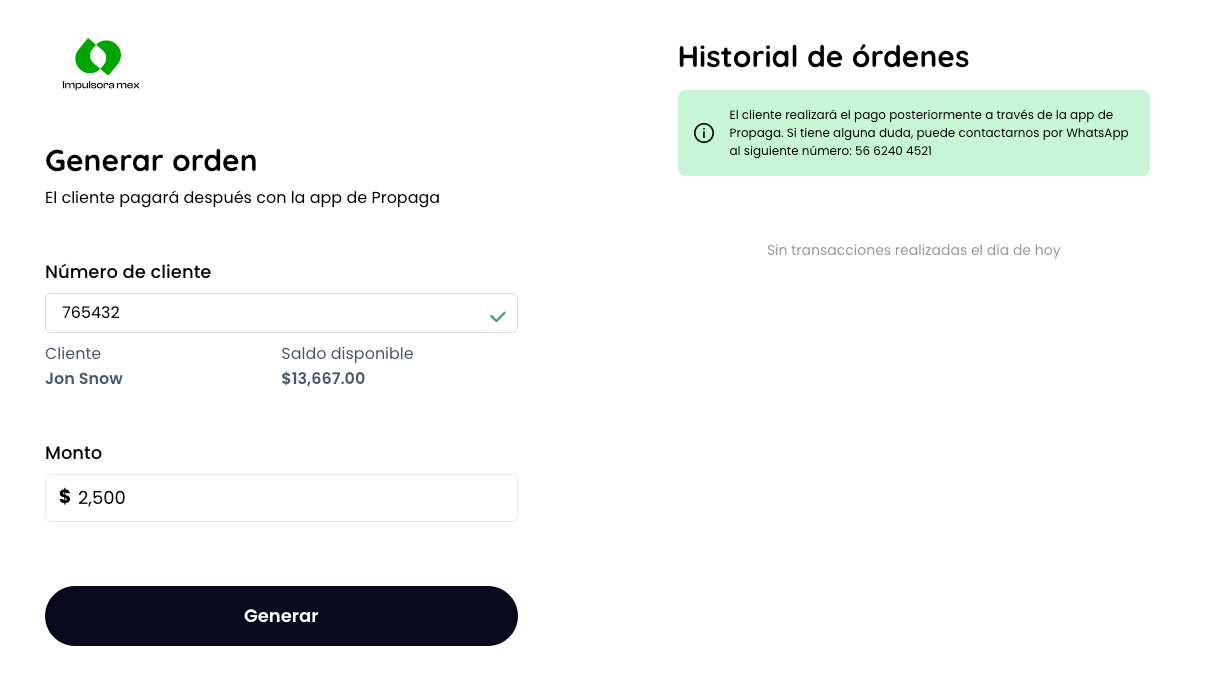
You will need to capture the total amount of the order to pay. This amount needs to be less than the credit available of the user. If everything is correct, click on the button "Generar".
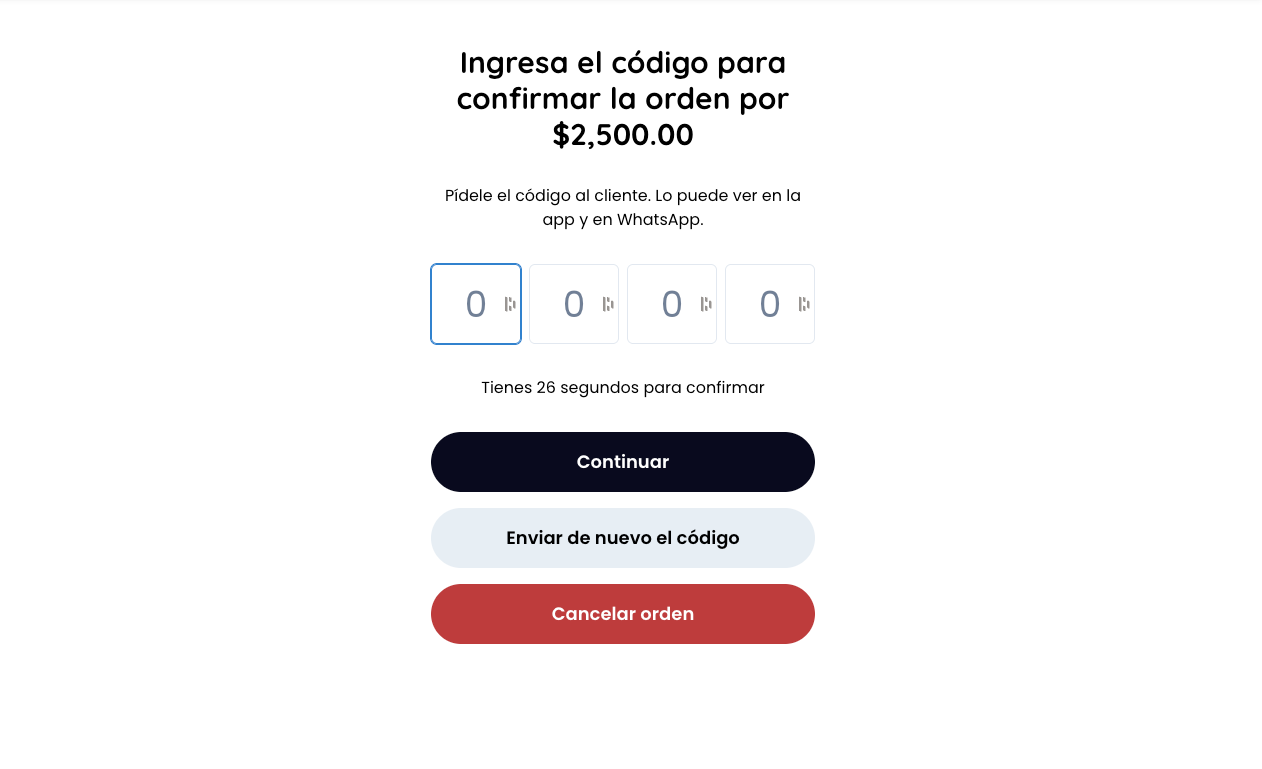
You will need to ask the customer for the OTP code sent to their phone number. Once the OTP code is captured, click on the button "Confirmar". You can also cancel the order if needed or resend the OTP code to the customer.
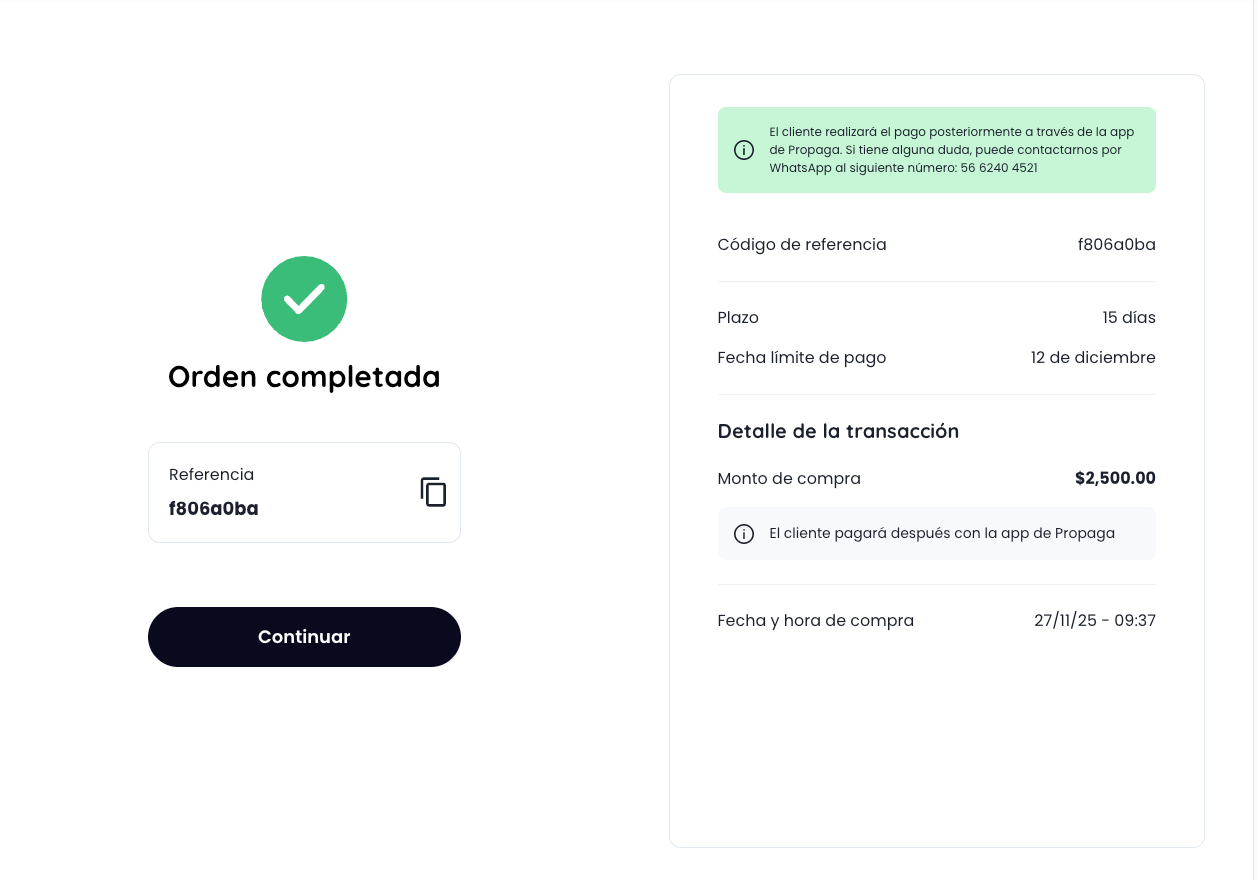
Once the order is successfully created, you will see the order details and the total amount of the order. If needed, the system will print a receipt to reconcile the order with your system. The order's reference number will also appear to be copied and saved in your system.
Once the order is confirmed, the status of the transaction will be updated to **delivery** and the user will be able to proceed with the payment. For additional details on how transaction statuses works, click this [link](/about/transaction-status)